Start using Pluto
What is a Notebook?
The images in this section were created on a computer with the Dark Mode enabled. Except for the color pallete, everything should be positioned and work exactly the same for a user in Light Mode.
If your graphical environment isn’t as greyish, don’t worry. Although it is certainly worse for your eyes!
Notebooks are a new standard in scientific research and data analysis. They are usually open-source interactive web applications to create and share documents that bring together code (to perform computations), outputs (such as plots, tables, visualizations, etc.), and formatted text (to explain stuff). Pluto is a Julia package that creates such an environment. A Pluto Notebook is a Julia file (with a .jl) to be run inside a Pluto session.
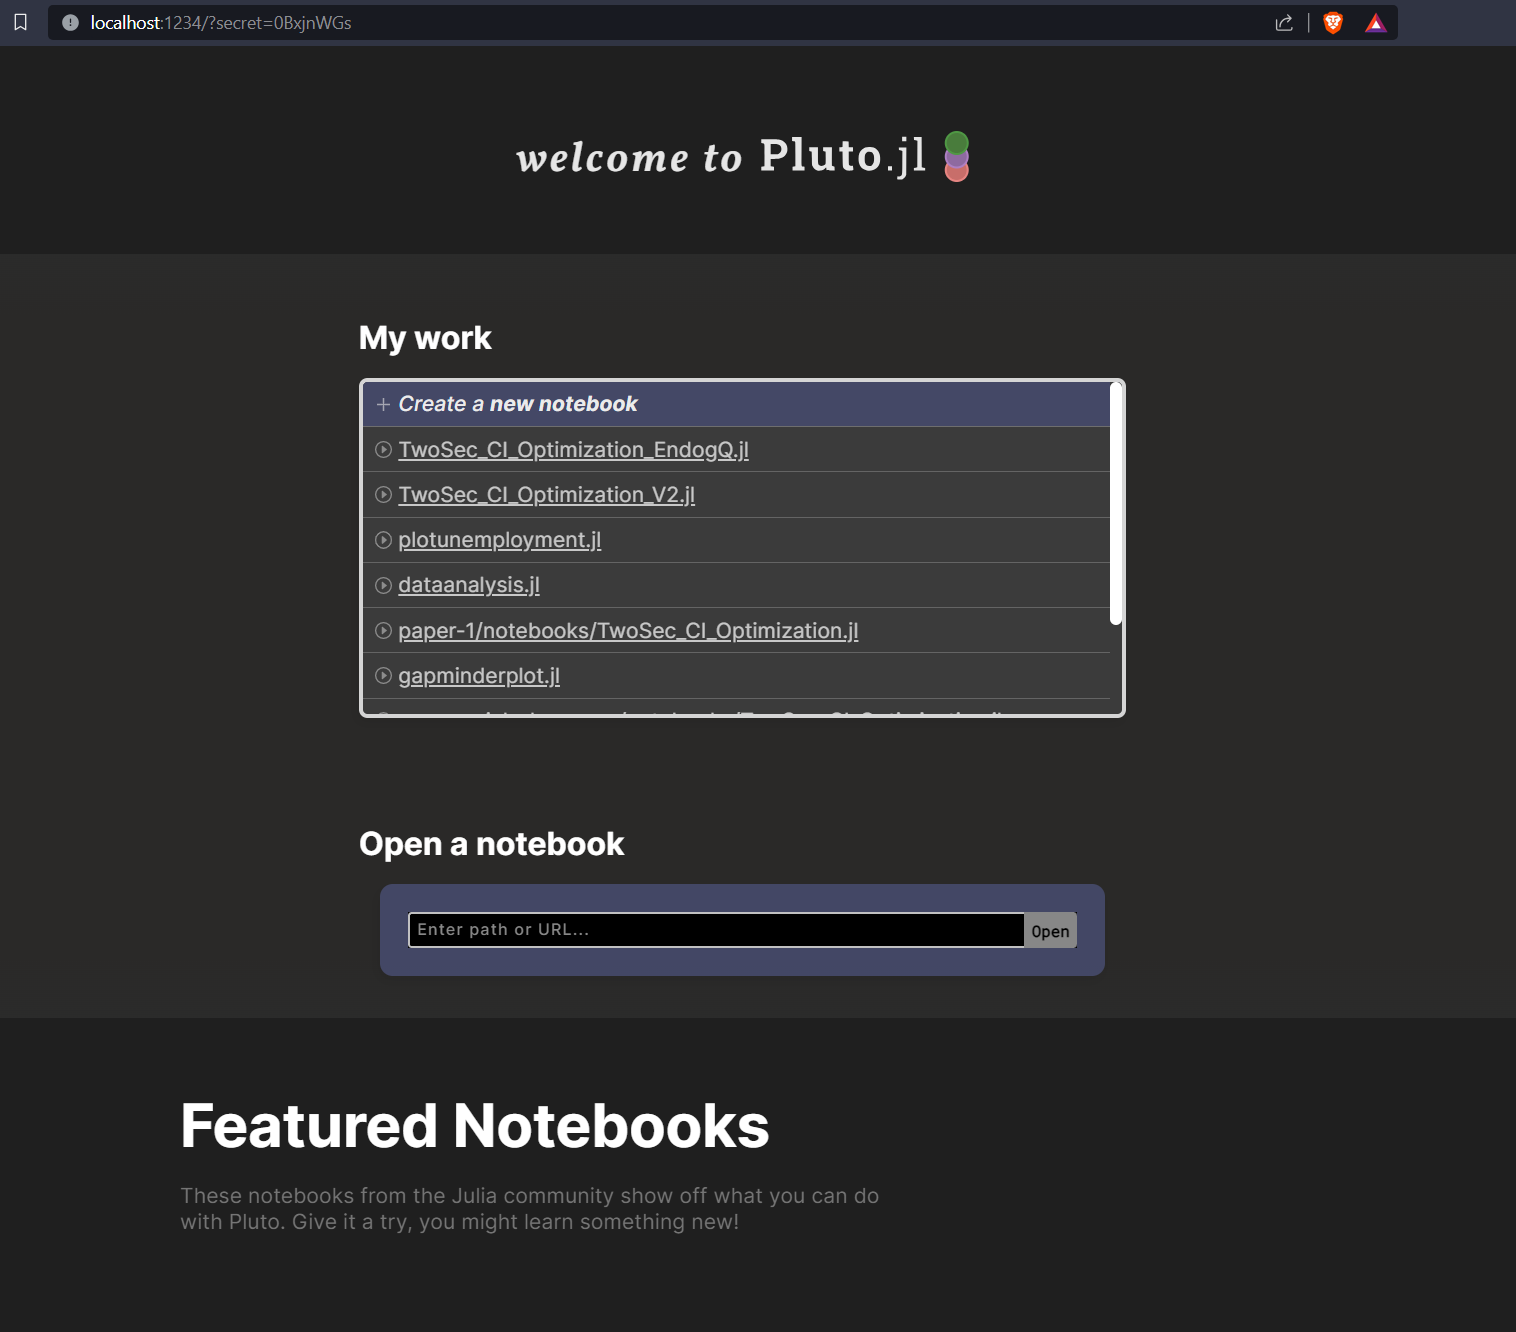
It is structured in cells where we introduced the contents: either Julia code to be performed or text to be formatted:

Pluto runs the cells interactively within the Notebook, allowing you to see the results of your code immediately, making it great for data exploration and experimentation. Each Notebook is a full-powered Julia environment, where you may use any package available inside the language ecosystem. On the contrary to other similar softwares, Pluto Notebooks are reactive. This means that any changed code takes effect instantly and deleted code leaves no trace. «At any instant, the program state is completely described by the code you see.»
Opening a Pluto Notebook
Please remember that any time you want to run Pluto you first need to run Julia. Once in JuliaJulia mode, run:
add Plutoadd Pluto \(\rightarrow\) ↩ Enter↩ Enter
- To open a Pluto notebook, the double-click on top of the file does not work
- Neither do the usual drag-and-drop in Mac
- Even if the drag-and-drop seems to work, do not do it … you will loose your work
- You must tell Pluto where your notebook is located: you need to copy the Path into the Pluto window.
1. Getting the Notebook Path
Copying the Path in Windows 11
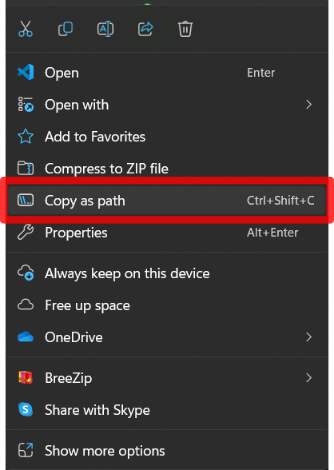
- Put the cursor on top of your file
- Mouse right-click on your file
- You will get a pop-up menu with a lot of options
- Choose: Copy as pathCopy as path
- See next image
Copying the Path in a Mac
- Put the cursor on top of your file
- Mouse right-click on your file
- Choose: Get infoGet info
- Copy the path in WhereWhere or LocalLocal, depending on your Mac
- The Path will look like this:
\(~~~~~~\) G:/Macro/Week01
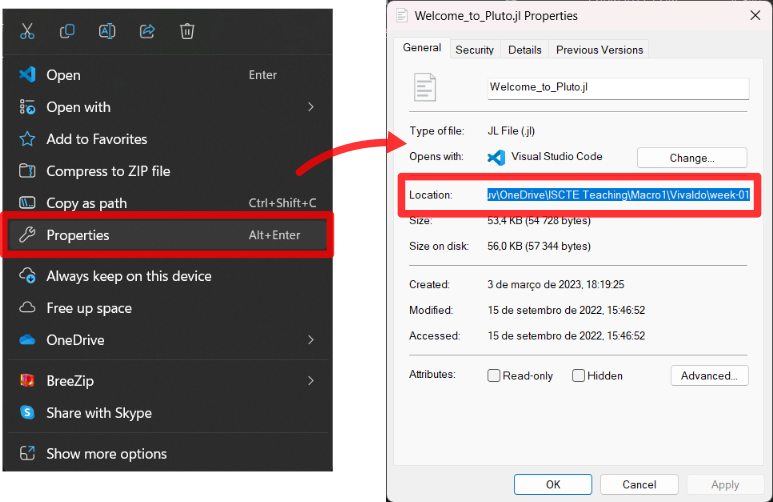
Copying the Path in Windows 10
- Go to the folder where your Notebook.
- To obtain this path, press the mouse’s right button on top of that folder, click on PropertiesProperties, and copy the path seen in the LocationLocation entry.
- See the following images for an example:
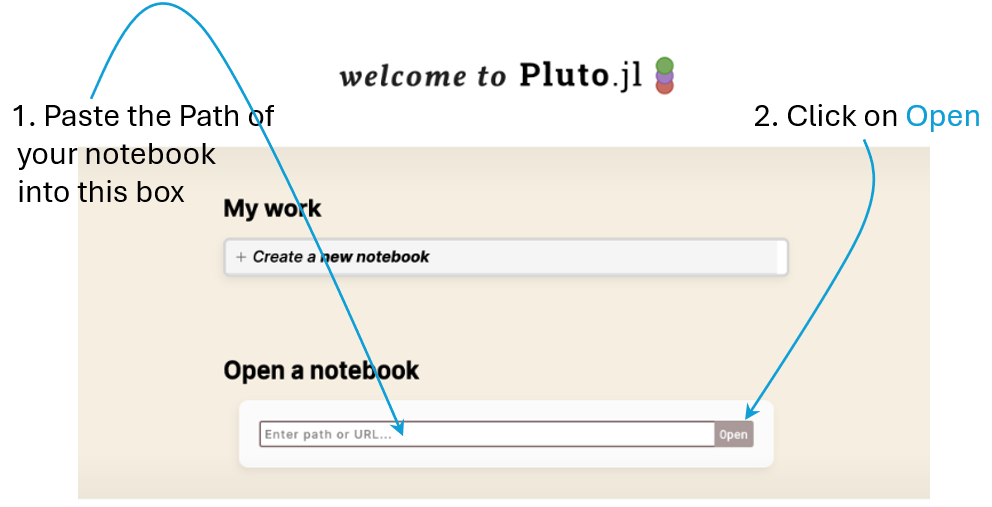
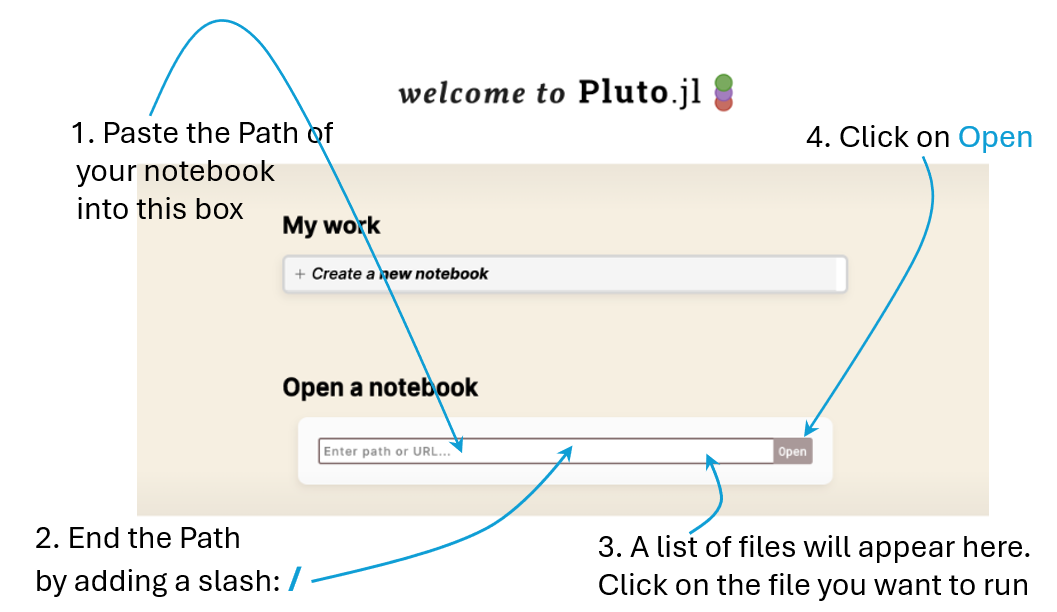
2. Pasting the Notebook Path into Pluto
Pasting the Path in Windows 11
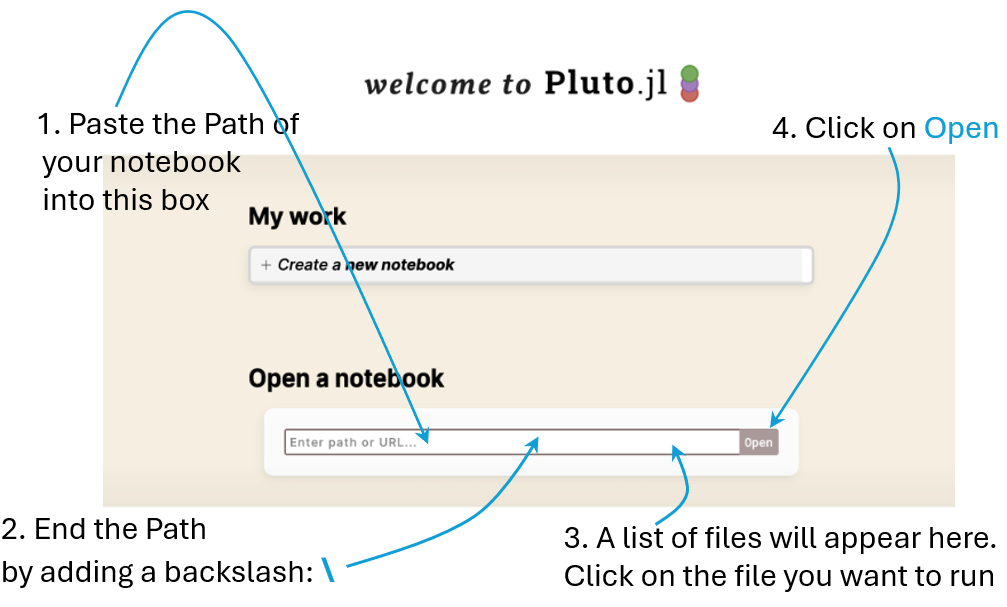
Pasting the Path in a Mac
Pasting the Path in Windows 10
3. Running the Notebook
- When you click on Open in the previous step, you will see the notebook visible on your browser
- To run all cells, click on the button Run notebook code that you see in the following image:

- The Notebook is ready to use when the SatusSatus panel on the bottom-right of the page stops blinking.

Running a cell and saving a Pluto Notebook
When we apply changes to a Notebook, by creating a new cell or introducing changes to an existing cell, there are two ways to run these changes:
- To run an individual cell:
- Click Shift+↩ EnterShift+↩ Enter
- Click on the small circle as in the figure below:
- Click Shift+↩ EnterShift+↩ Enter

- To run all cells and saving the entire Notebook: Ctrl+SCtrl+S
Exporting a Pluto Notebook
- A Pluto Notebook can be exported in three other formats:
- as a JuliaJulia file
- as a HTMLHTML file
- as a PDFPDF file
- There is a small icon with the export box at the top right-hand side of the monitor

- Then choose the format of your preference
