Introduction to Pluto
Week 01
Tasks in week 1
- Everything in this course will be done using a computer
- Theoretical questions
- Practical exercises
- Mock tests/exams
- Formal evaluation moments: tests/exams
Tasks in week 1
- We have to install two programs on your computer:
- Julia programming language
- Pluto.jl (one package developed for Julia)
- Week 1 deals only with the introduction to Pluto notebooks
- No macroeconomics will be taught during this week
- Do not worry:
- this is a macroeconomics course
- not a computational one
- you will learn macroeconomics in the following weeks
2. Running Julia
Starting Julia
- To start Julia, click on its icon on the desktop:
\(~~~~~~~~~~~~~~~~~~~~~~~~~~~~~~~~~~\)
Julia window
The following black window will appear on your monitor: \(~~~~~\)

Julia runs in two modes: Julia mode and Pkg mode
what are these modes for? Next slides
Julia mode
When we start Julia, by default it runs in Julia mode.
In the image below, \(\color{red}{\text{julia>}}\) indicates that we are in this mode:
In Julia mode we do computation:
- we write code
- and the computer executes it and displays the output.
Julia mode: an example
- If you type 4+4 followed by ↩︎ Enter after the prompt \(\color{red}{\text{julia>}}\)
- You will get 8 as the output.

Julia mode: an example
- If you type 4+4 followed by ↩︎ Enter after the prompt \(\color{red}{\text{julia>}}\)
- You will get 8 as the output.
Julia is installed and running well.
Julia window is ugly and not very handy
That is the reason why we will use Pluto notebooks instead.
Pkg mode
- To move from Julia mode to Pkg mode, in mode \(\color{red}{\text{julia>}}\) :
- type the following character on your keyboard: ]
- Different keyboards have different ways of typing ]
- click simultaneously on Alt Gr and 9 (usually do it on Windows)
- click simultaneously on Option and 9 (usually do it on Mac)
- click simultaneously on Alt Gr and 9 (usually do it on Linux)
- click simultaneously on Alt Gr and 9 (usually do it on Windows)
- In Pkg mode we create projects and install packages
Pkg mode
Now, \(\color{blue}{\text{(@v1.11) pkg>}}\) in the black window indicates that we are in Pkg mode:
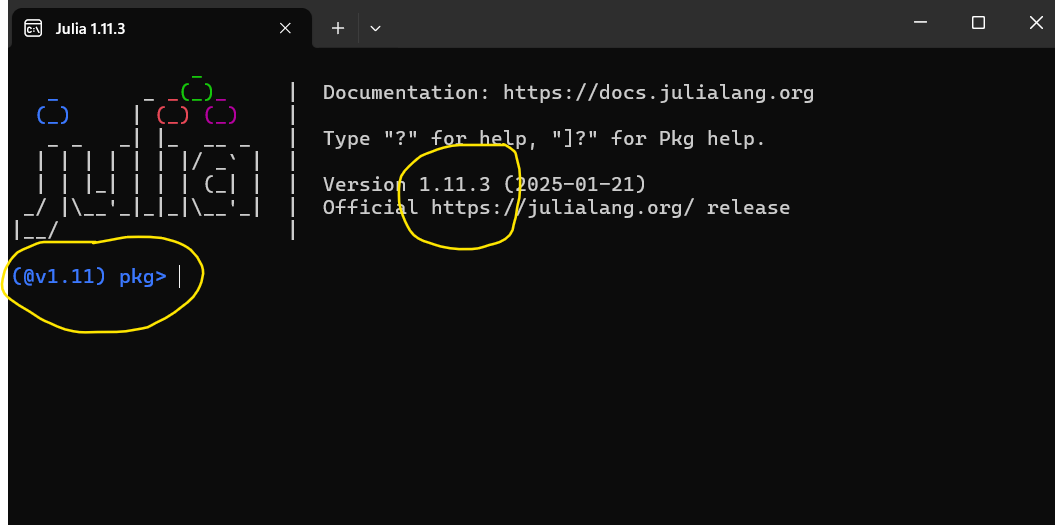
To go back to mode \(\color{red}{\text{julia>}}\), click on the following keyboard’s key:
- ⇦backspace (on Windows),
- delete (on a Mac)
- ⇦backspace (on Linux)
5. Using Pluto
See more detailed information available here
Starting Pluto
- Start Julia and keep it in mode \(\color{red}{\text{julia>}}\)
- Type in its black window: import Pluto ; Pluto.run()
- Click on ↩︎ Enter and Julia will open Pluto in your browser
- You will see a window like this:
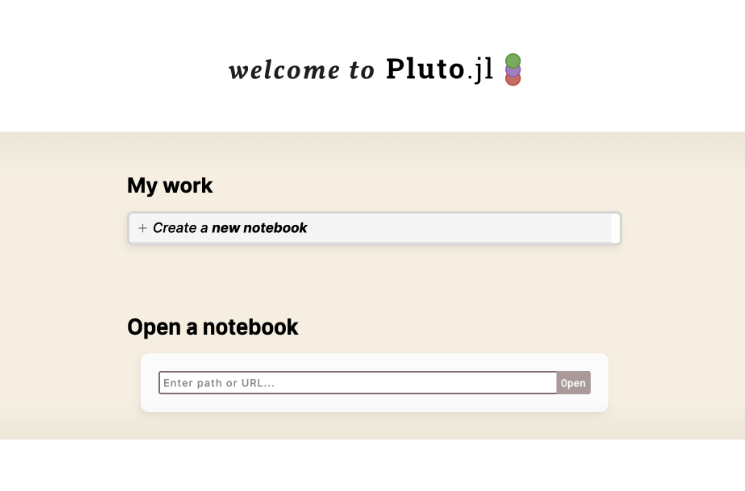
Opening a Pluto notebook
- A Pluto notebook is an electronic file, like Excel or Power Point files.
- The extensions are different:
- .jl (Pluto file), .xls (Excel file), .ppt (Power Point file)
- To open a Pluto notebook, the double-click on top of the file does not work
- Neither do the usual drag-and-drop in Mac
- Even if the drag-and-drop seems to work, do not do it …
- …you will loose your work
- You have to tell Pluto where your notebook is located.
Opening a Pluto notebook
To tell Pluto where your notebook is located, you have to:
- Put the Pluto notebook in a folder on your computer.
- So your notebook has an address (Path) on your computer
- You have to copy that address and paste it into Pluto’s Open a notebook window
- How to get the address (Path) of your notebook?
- See next slide
Copy your notebook’s path: Windows 11
- Put the cursor on top of your file
- Mouse right-click on your file
- You will get a pop-up menu with a lot of options
- Choose: Copy as path
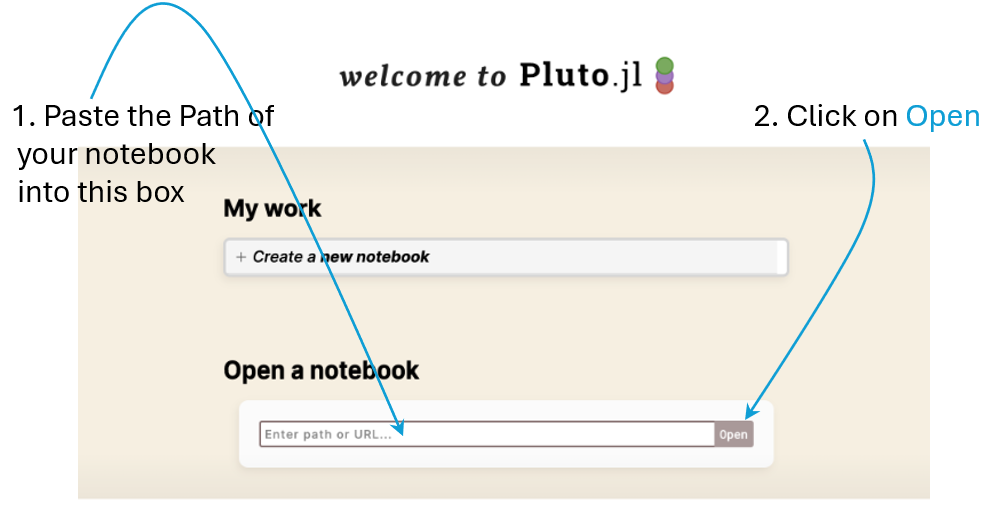
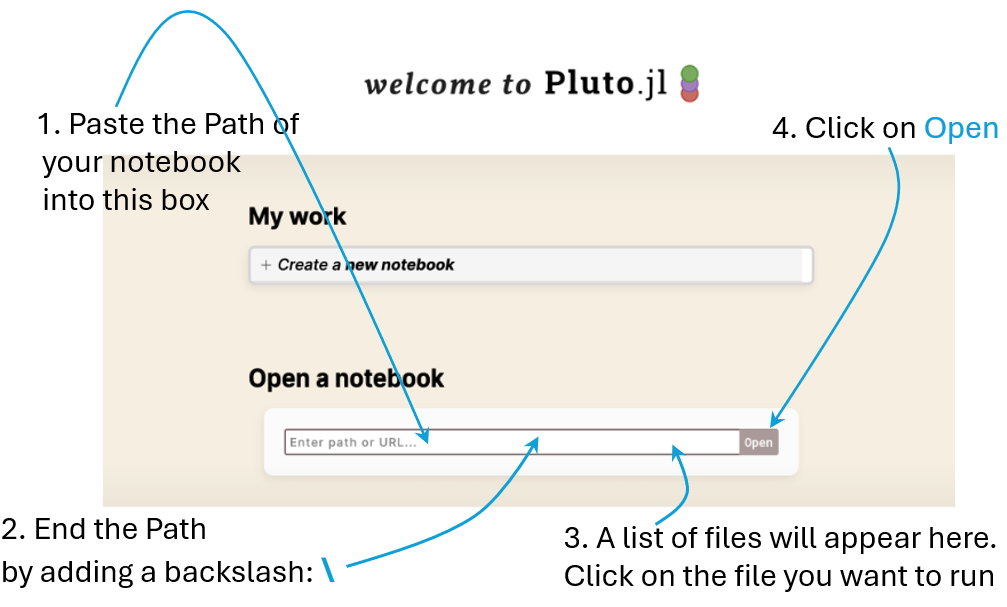
- Go to the Pluto window you have opened before
- Paste the copied path into the Open a notebook box in the Pluto window
- See next figure (click on any key)
Copy your notebook’s path: Windows 11
Copy your notebook’s path: Windows 10
- Put the cursor on top of your file
- Mouse right-click on your file
- Choose: Properties
- Copy the path in Location
- The Path will look like this:
\(~~~~~~\) G:\Macro\Week01 - Paste the copied path into the Open a notebook box in the Pluto window
- See next figure (click on any key)
Copy your notebook’s path: Windows 10
Copy your notebook’s path: Mac
- Put the cursor on top of your file
- Mouse right-click on your file
- Choose: Get info
- Copy the path in Where
- The Path will looke like this:
\(~~~~~~\) G:/Macro/Week01 - Paste the copied path into the Open a notebook box in the Pluto window
- See next figure (click on any key)
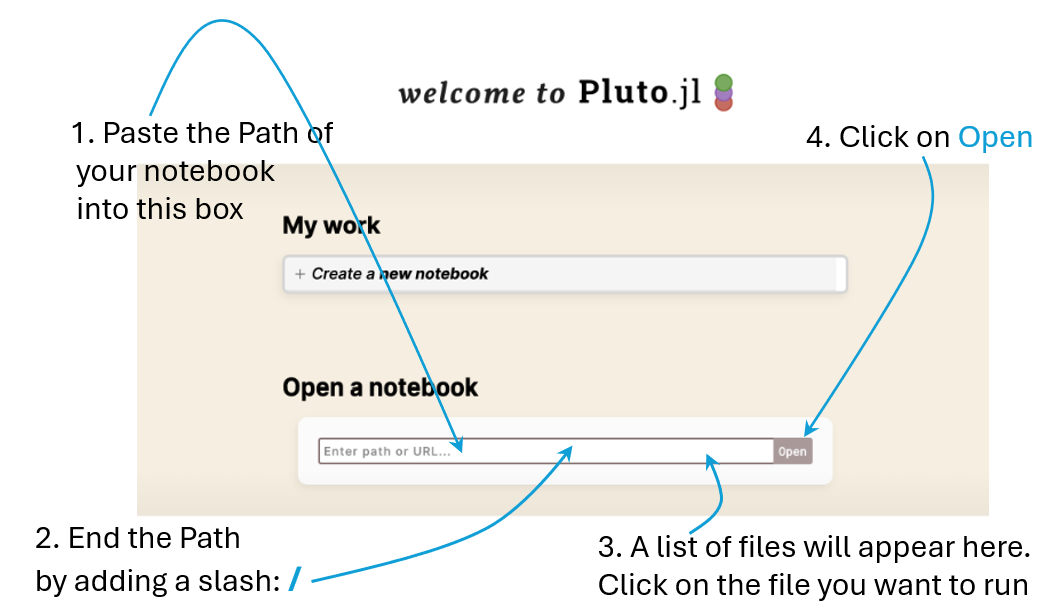
Copy your notebook’s path: Mac
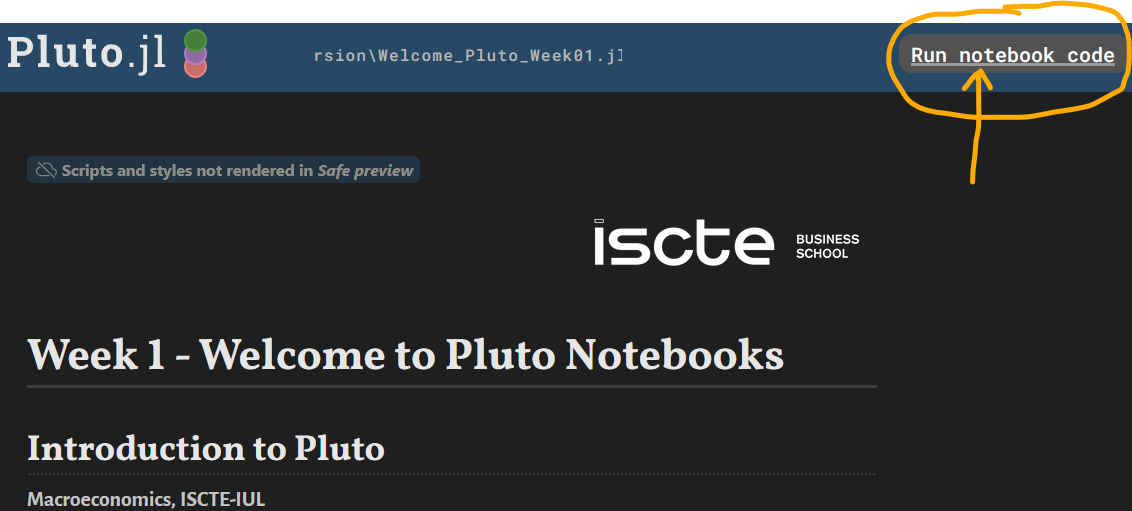
Run the notebook
- By now, you will see the notebook visible on your browser
- To run all cells, click on Run notebook code that you see in next image: